In this guide, I will install cPanel and then perform some basic steps that I recommend for every new cPanel installation.
- Install cPanel
- Set server time
- Install ConfigServer Firewall (CSF) and whitelist your IP
- Change SSH port and allow it in the firewall
- Disable root login and add wheel user
- Limit WHM and SSH access
- Disable all LFD email alerts
- Enable Shell Fork protection
- Enable SMTP Restrictions
- Install PHP and needed extensions
- Upgrade to a newer MySQL version or switch to MariaDB
- Tweak Email and Security Settings
- Install free SSL provider: Let’s Encrypt
- Change Apache configuration
- Install FTP server (PureFTP)
- Install WP Toolkit
- Enable All features (FTP, WPTtoolkit, AutoSSL, etc.)
- Increase limits in MultiPHP INI editor
- Consult cPanel Security Advisor
- Create a new package
- Create a new cPanel account
Install cPanel
Set FQDN as hostname and then in screen start the cpanel installation script:
hostname srv.domain.tld
screen
cd /home && curl -o latest -L https://securedownloads.cpanel.net/latest && sh latest
After about 15 minutes cPanel will be installed and we can start tweaking it. First login to WHM (open in browsers IP:2087), and accept the terms of service

add your email address and nameservers (optionally)

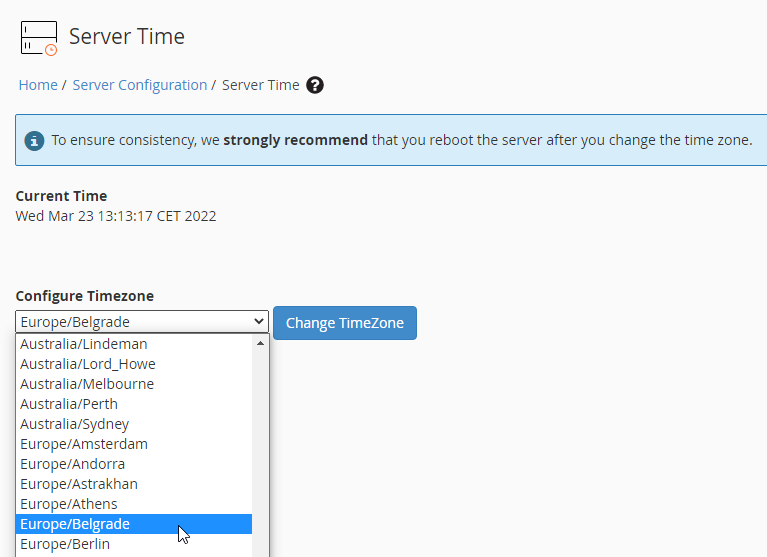
Set server time
timedatectl set-timezone UTCor
cp /usr/share/zoneinfo/Europe/Belgrade /etc/localtimeor WHM > Server Configuration > Server Time
Install CSF
ConfigServer Security & Firewall (CSF) is an advanced open-source firewall that contains a stateful packet inspection (SPI) firewall, a login and intrusion detection mechanism, and a general security application for Linux servers.
Another useful feature of CSF is LFD deamon that will alert you when processes get stuck, someone logs to ssh, RAM usage is high, etc.
cd /usr/src  && wget https://download.configserver.com/csf.tgz
tar -xzf csf.tgz
cd csf && ./install.sh
After the installation navigate to WHM > Plugins > ConfigServer Security & Firewall
Under Firewall Configuration set TESTING = Off then Save & restart CSF.

If you use a static IP whitelist it in the firewall:

Change SSH port
nano /etc/ssh/sshd_config
Uncomment port 22 and change it to some random number, e.g. 2629

Go back to CSF > Firewall Configuration and allow the new port under TCP_IN then Save & restart CSF.

Disable root SSH login
To disable root login edit the sshd_config file
nano /etc/ssh/sshd_configand remove the hashtag ( # ) from the beginning of the line #PermitRootLogin yes

Restart the sshd service afterwards:
service sshd restartLimit WHM and SSH access
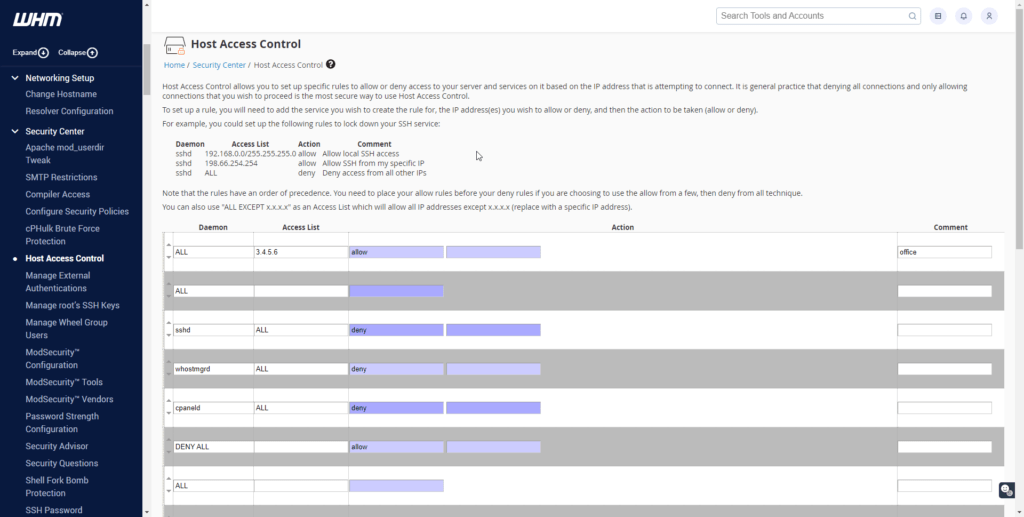
With Host Access Control you can limit access to the WHM, SSH or even cPanel service to only selected IP’s. If you use a dynamic IP I recommend disabling at least WHM access to the public and only allow it for your IP.
Edit /etc/hosts.allow file and allow access to all services to your IP and deny WHM to everyone else:
ALL : 3.4.5.6 : allow
#allows access to all services to the above IP


ALL : 192.168.0.0/255.255.255.0 : allow
#allows access to services from localhost

sshd : ALL : deny
#deny SSH access to everyone else

whostmgrd : ALL : deny
#deny WHM access to everyone else

cpaneld : ALL : deny
#deny cPanel access to everyone else

DENY ALLDisable LFD email alerts
Aldo these email alerts can be useful, If you plan on using another monitoring solution instead, then I recommend disabling them.
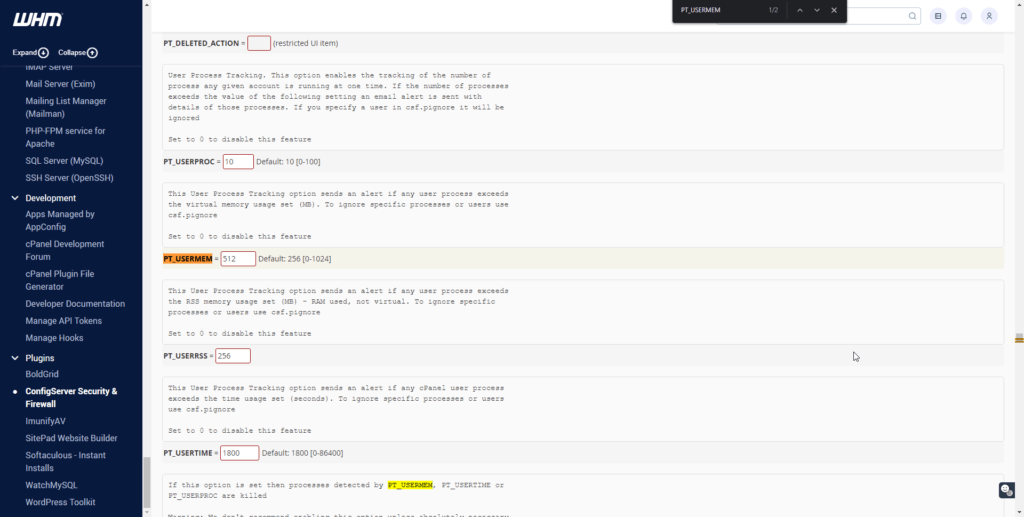
To disable all LFD email alerts navigate to CSF > Firewall Configuration then find&change the following settings:
PT_USERMEM 0
PT_USERTIME 0
LF_INTEGRITY 0
PT_LIMIT 0
LF_EMAIL_ALERT Off
LF_PERMBLOCK_ALERT Off
LF_NETBLOCK_ALERT Off
LF_DISTFTP_ALERT Off
LF_DISTSMTP_ALERT Off
LT_EMAIL_ALERT Off
LF_QUEUE_ALERT 0
LF_SCRIPT_ALERT 0
PT_USERPROC 0
LF_SSH_EMAIL_ALERT 0
X_ARF Off
LF_SELECT Off
LF_WEBMIN_PERM 0
LF_SU_EMAIL_ALERT Off
LF_WEBMIN_EMAIL_ALERT Off
LF_APACHE_ERRPORT 0
LF_DISTFTP_PERM 0
LT_IMAPD 0
LF_CPANEL_ALERT Off
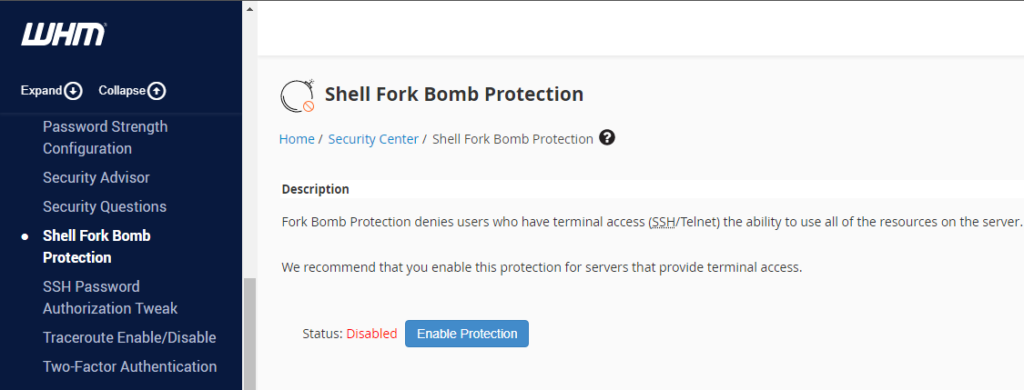
Enable Shell Fork Protection
/usr/local/cpanel/bin/install-login-profile --install limits
/usr/local/cpanel/bin/install-login-profile --uninstall limits
or from WHM > Security Center > Shell Fork Bomb Protection
Enable SMTP Restrictions
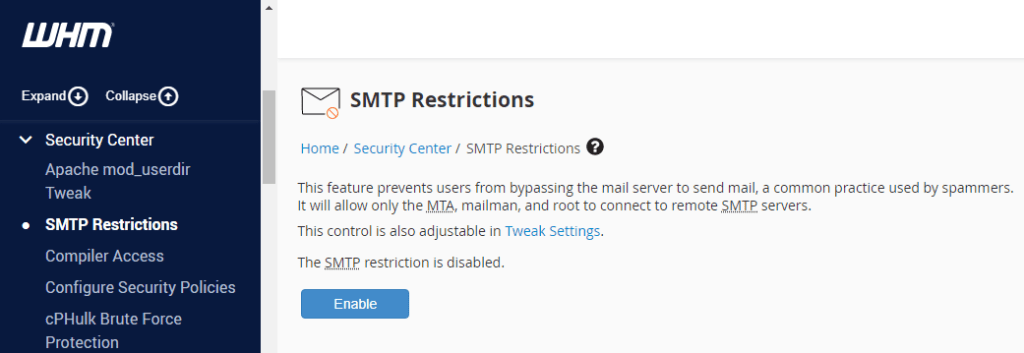
You should disable outgoing SMTP connections if you are not planning to send emails from another server, e.g. running a website on this VPS and then sending emails through contact forms using a gmail account.
/scripts/smtpmailgidonly on
or from WHM > Security Center > SMTP Restrictions
Install PHP and extensions
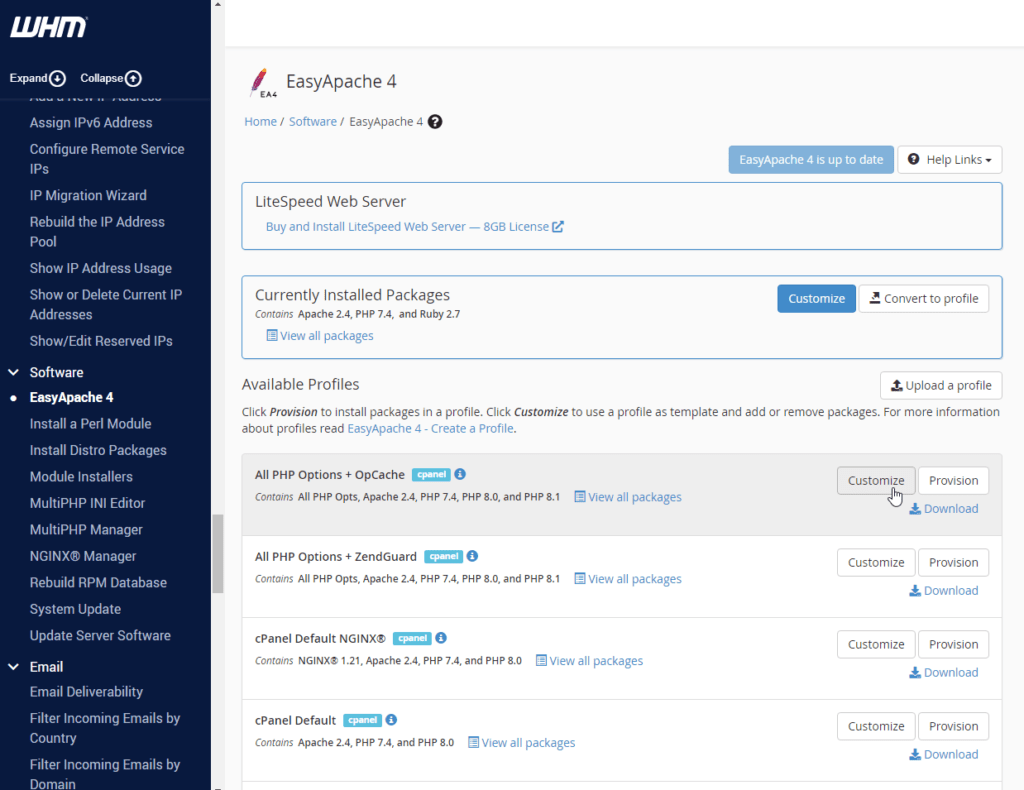
To install the needed PHP version and extensions navigate to EasyApache4 and click on the customize button next to the “All PHP Options + OpCache” section.
under Apache modules select mod_http2

Install needed PHP versions with all recommended extensions

or add custom extensions on next step

and finally, click on Provision

TIP: Save the EA profile template afterward and reuse it on new cpanel installations.
Upgrade MySQL
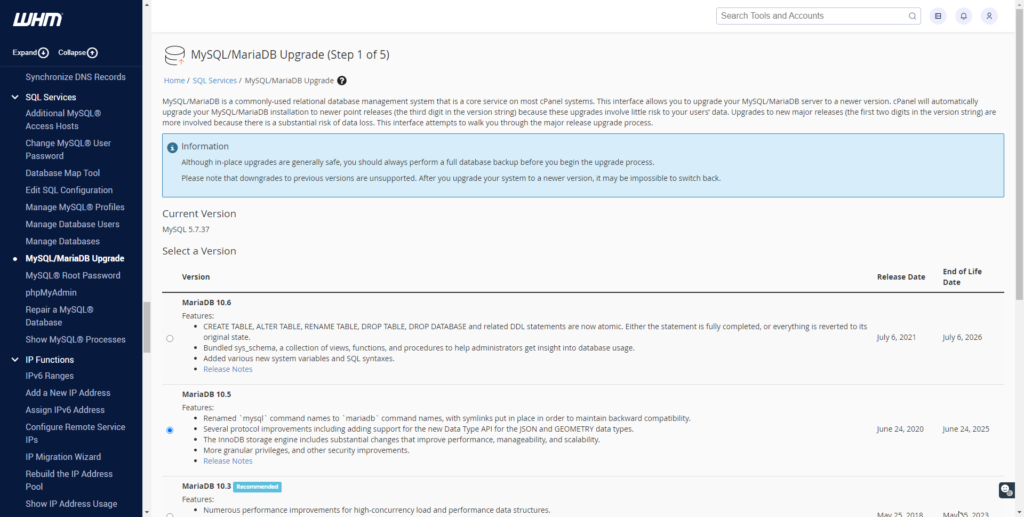
By default cPanel installs MySQL 5.7, but if you want to use ay newer version, or even switch to MariaDB then you can do so from SQL Services > MySQL/MariaDB Upgrade
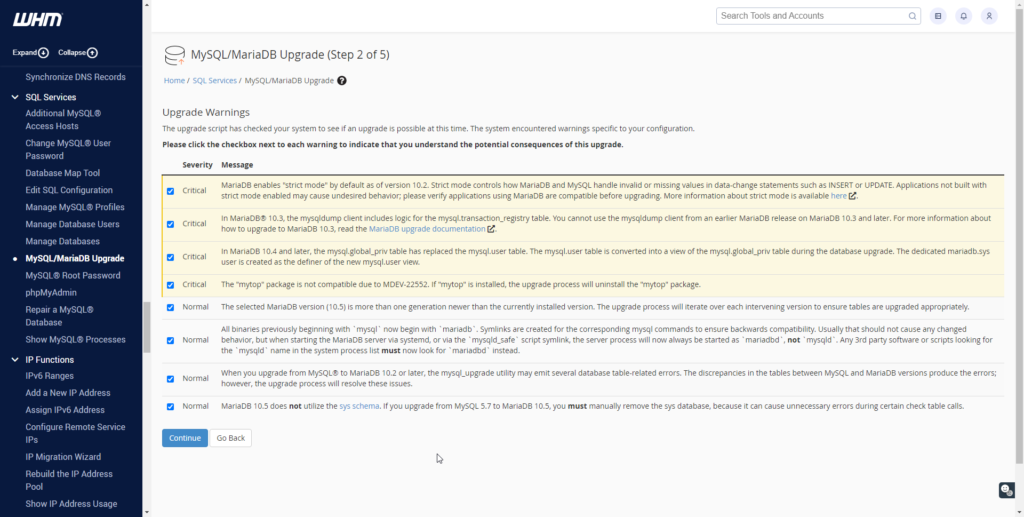
After selecting the desired version click on the Continue button and on the next step check all warnings:
Select Unattended Upgrade, click on Continue button

and wait for the process to finish.
Tweak Settings
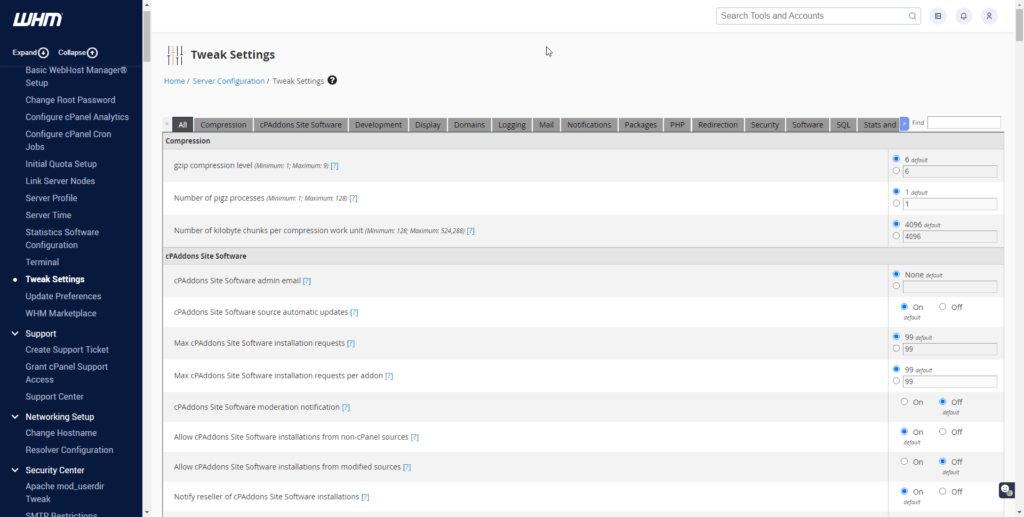
Under Tweak Settings edit email and security settings such as allowing creation of document roots outside public_html folder, disabling password reset from cpanel etc.
I recommend setting the following:
| Restrict document roots to public_html | Off |
| Reset Password for cPanel accounts | Off |
| Email delivery retry time | 5m |
| Max hourly emails per domain | 5000 |
| The percentage of email messages to queue and retry for delivery. | 150 |
| Number of emails a domain may send per day before the system sends a notification. | 10000 |
| Default user-defined quota value for new email accounts | 2048MB |
| Restrict outgoing SMTP to root, exim, and mailman (FKA SMTP Tweak) | On |
| Prevent “nobody” from sending mail | Off |
| cPanel PHP loader | ioncube |
| Allow unregistered domains | On |
| Allow Remote Domains | On |
| cPanel PHP max execution time | 180s |
| cPanel PHP max POST size | 512MB |
| cPanel PHP max upload size | 156MB |
| Reset Password for cPanel accounts | Off |
Install Let’s Encrypt
By default, cPanel uses Sectigo as a free SSL provider but due to recent rate-limiting and often technical problems with SSL renewals, I recommend using Let’s Encrypt instead.
To install Let’s Encrypt run the following command:
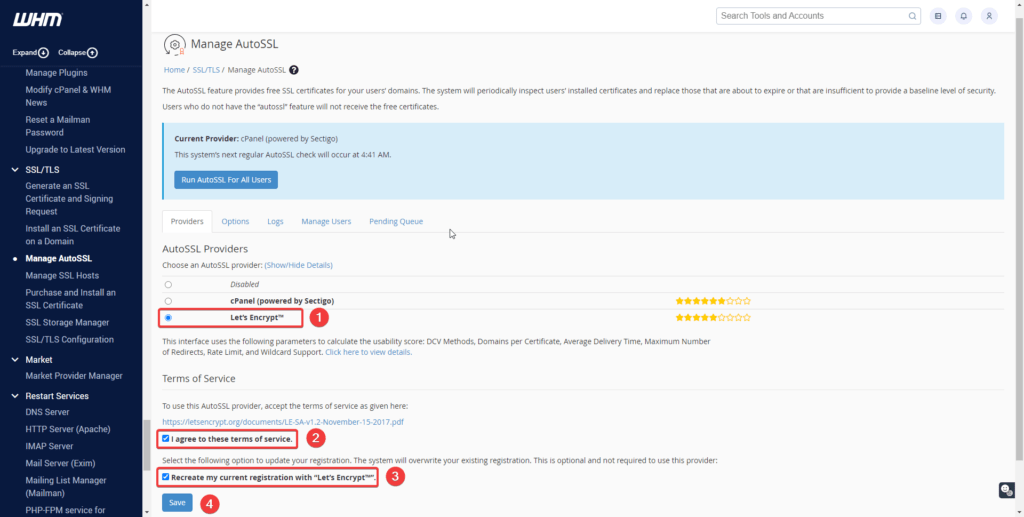
/usr/local/cpanel/scripts/install_lets_encrypt_autossl_providerThen navigate to WHM > SSL/TLS > Manage AutoSSL select Let’s Encrypt™ agree to the terms and create a registration:
Change Apache configuration
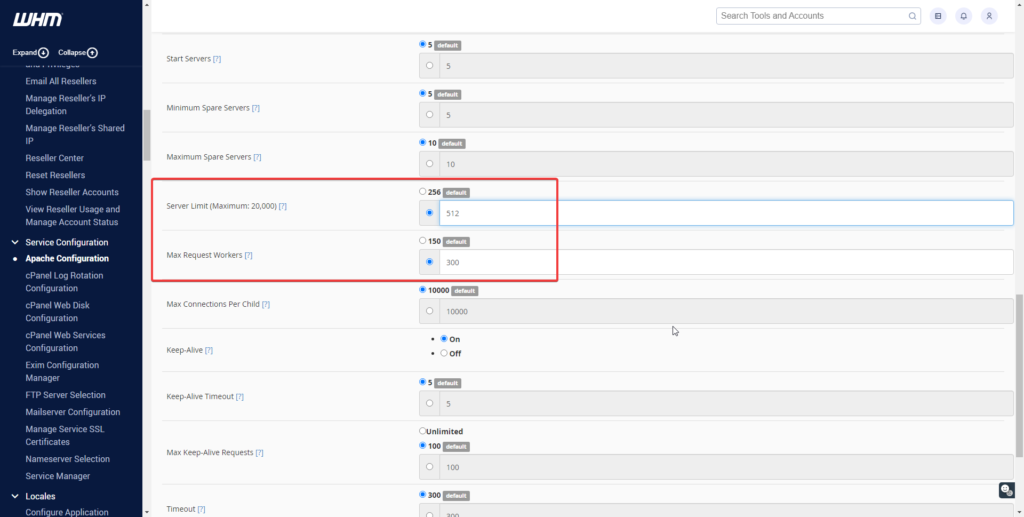
Under WHM > Service Configuration> Apache Configuration > Global Configuration increase Max Request Workers and Server Limit:
Install FTP
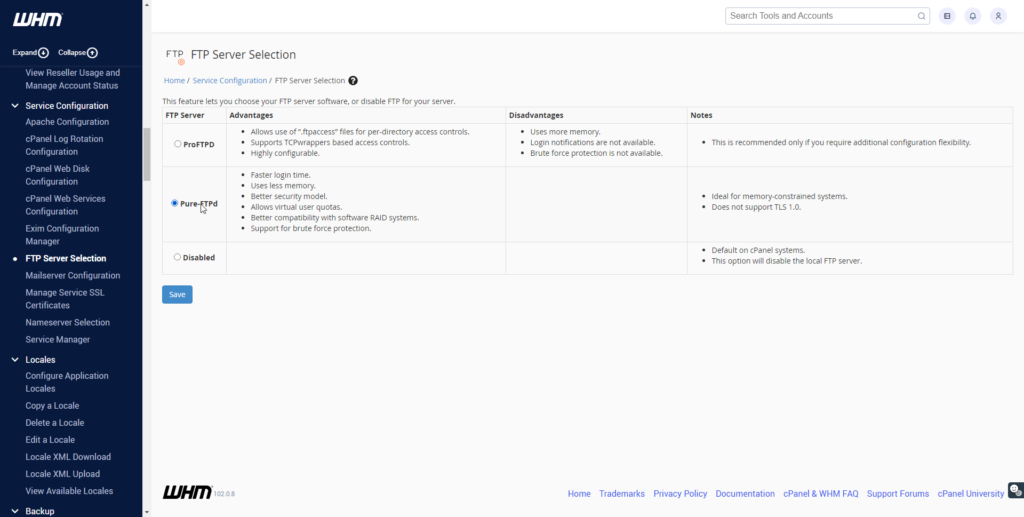
By default, no FTP server is installed on cPanel, so if you need one navigate to FTP > FTP Server Selection and select one – I personally recommend PureFTP.
Install WP Toolkit
WPToolkit has a free version, to install it run the following command:
sh <(curl https://wp-toolkit.plesk.com/cPanel/installer.sh || wget -O - https://wp-toolkit.plesk.com/cPanel/installer.sh)Afterward go to WHM > Plugins > WordPress Toolkit and modify settings.
Enable Features
Under WHM > Packages >Feature Manager select the newly created feature list and enable all features except WP Toolkit Delux:
MultiPHP INI Editor
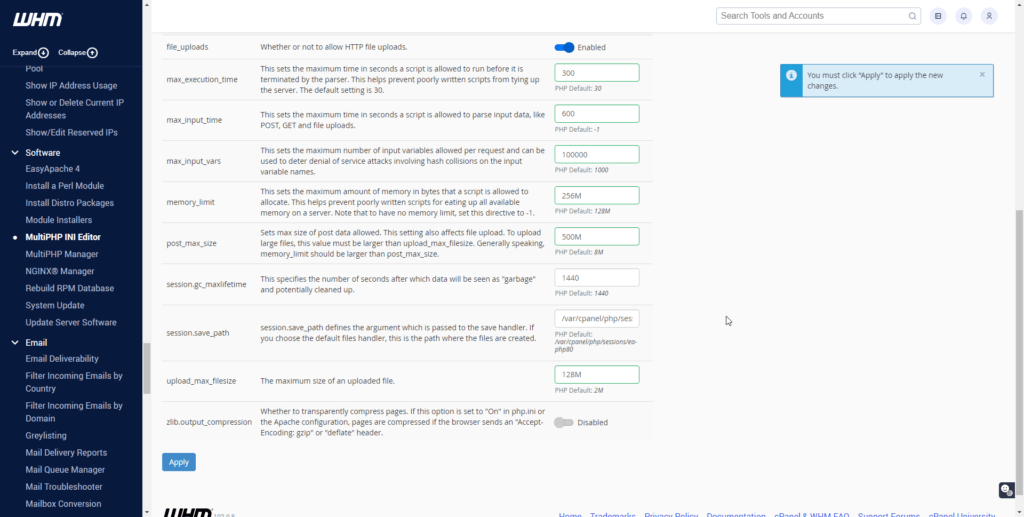
Inside WHM > Software > MultiPHP INI Editor change PHP limits, under Basic Mode increase limits for the PHP versions that you will be using, for example WP Toolkit requires a memory_limit of minimum 128M
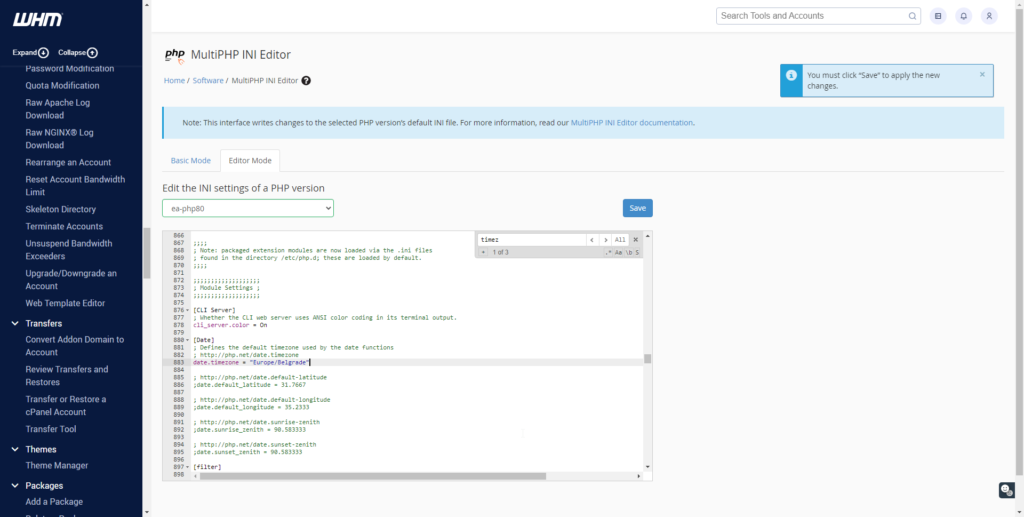
and under Editor Mode add custom settings per need, for example, set the date.timezone to the same as in WHM.
Consult cPanel Security Advisor
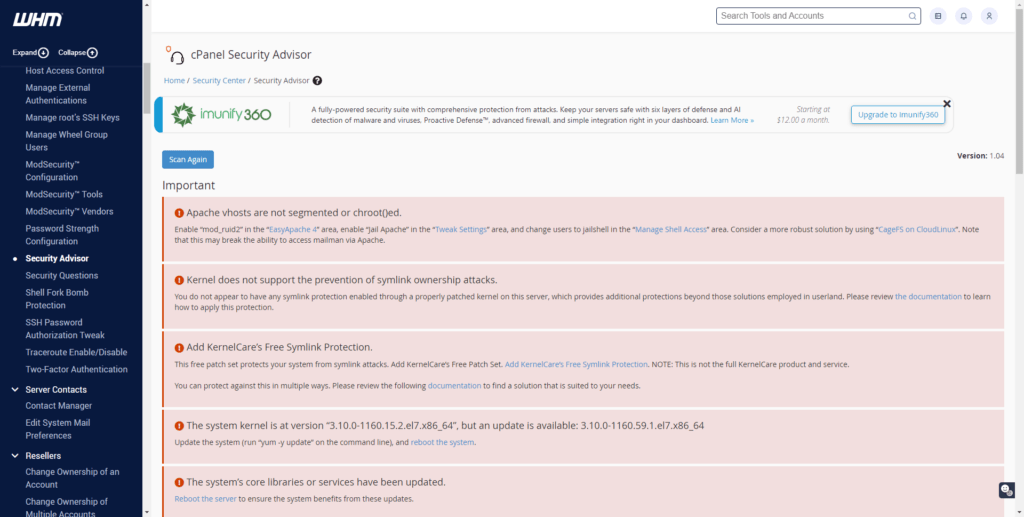
WHM has a useful tool called cPanel Security Advisor that will check for security issues and recommendations.
Run the check by opening the Security Advisor page or by clicking the Scan Again button on that page.
Create a new Package
Packages > Add a Package create a new package and set limits:

Create a new cPanel account
The last step is to create a new cPanel account under WHM > Account Functions click on Create a New Account then add the domain name and username, generate a strong password, and add the package that we created earlier.
Now you can open your cPanel domain name at the 2083 port number on your web browser and log into your cPanel using the new user account you just created above.






![node[175421]: pthread_create: Resource temporarily unavailable 2023 08 28 12 15 344x194 - node[175421]: pthread_create: Resource temporarily unavailable](https://pcx3.com/wp-content/uploads/2023/08/2023-08-28_12-15-344x194.png)