dig stands for Domain Information Groper and it’s a DNS lookup tool that is popular on Linux. The Windows NSLookup tool is the same DNS tool for Windows.
So, why would you use dig instead NSLookup tool on Windows? Well for one the dig tool is more flexible and powerful than it’s Windows counterparty.
To add the dig tool on Windows 10 we have to install BIND tools.
Step 1. Download BIND for Windows 10
Head over to the ISC website https://www.isc.org/download/#BIND and download the latest stabile version of BIND tools.
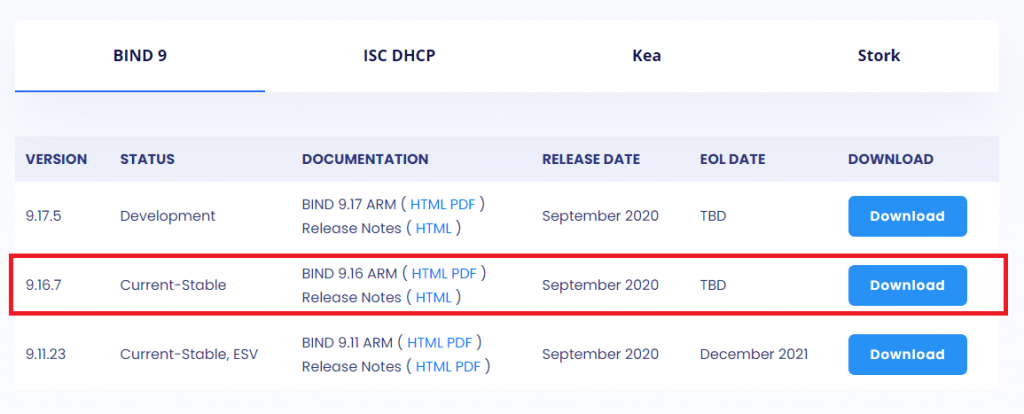
For Windows 10 we’re gonna download the 64-bit version.

Step 2. Install BIND Tools
After the download has finished, extract the ZIP file and run the BINDInstall as Administrator.

Windows (being the good protector it is 😀 ) is going to block the installer so go to More > Run anyway

make sure to select Tools only on the BIND installer:

If successful, you will see the message: “BIND installation completed successfully”.
Step 3.Add Dig to Windows Path
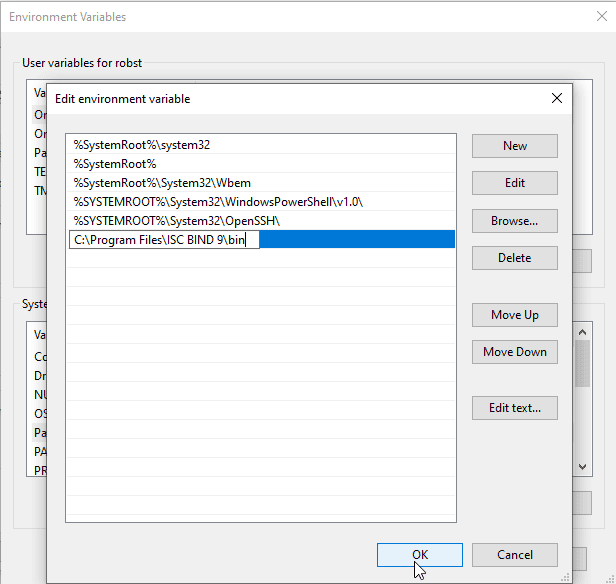
One more thing before we start using the dig tool: We need to add the bin dir (C:\Program Files\ISC BIND 9\bin) containing the dig.exe file to the Windows PATH variable.
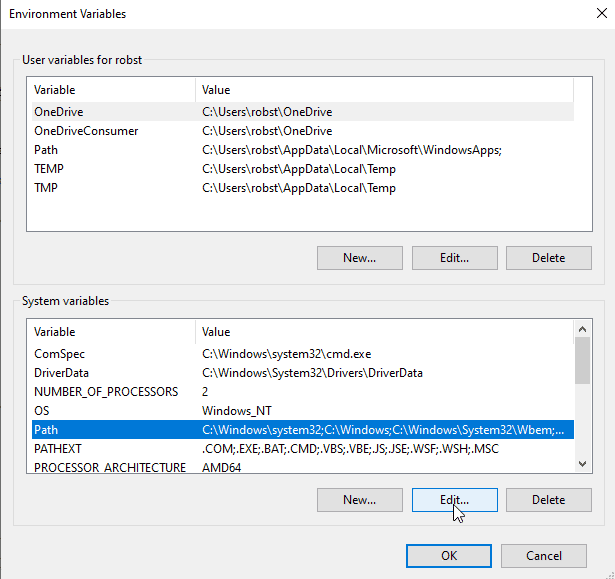
Right-click on This PC and select Properties. Go to Advanced system settings > Environment Variables. Edit the PATH variable under the System variables.
On New, paste the path to the installation: C:\Program Files\ISC BIND 9\bin
Step 4. Using the dig command
In Order to run the dig command you can use either PowerShell or Windows CMD.
The basic usage is to specify the doamin name you want to lookup and the type of the redord that you want to query. Here are a few examples:
Find IPv4 address of a domain (A record):
dig A example.com
Find IPv6 address of a dig domain (AAAA record):
dig AAAA example.com
Keep the answer short:
dig AAAA example.com +short
We can specify the nameserver we’d like to query:
dig A example.com @8.8.8.8looks up MX records:
dig mx example.com
The -x option performs a reverse lookup:
dig -x 8.8.8.8
Querying only the answer section:
dig example.com +nocomments +noquestion +noauthority +noadditional +nostats
For a more detailed guide on the dig command make sure to checkout the dig Wikipedia page.

