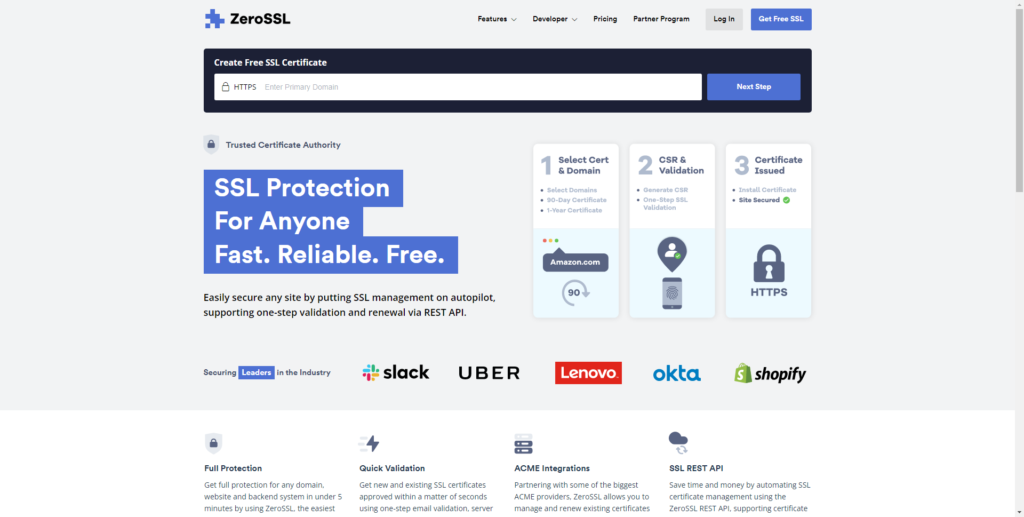
Step 1. Navigate to zerossl website and create a free account:
![Generate and setup free hostname SSL on WHM with ZeroSSL chrome mW9vD8sw7C 1024x517 - Generate and setup free hostname SSL on WHM with ZeroSSL](https://i0.wp.com/pcx3.com/wp-content/uploads/2021/12/chrome_mW9vD8sw7C.png?resize=736%2C372&ssl=1)
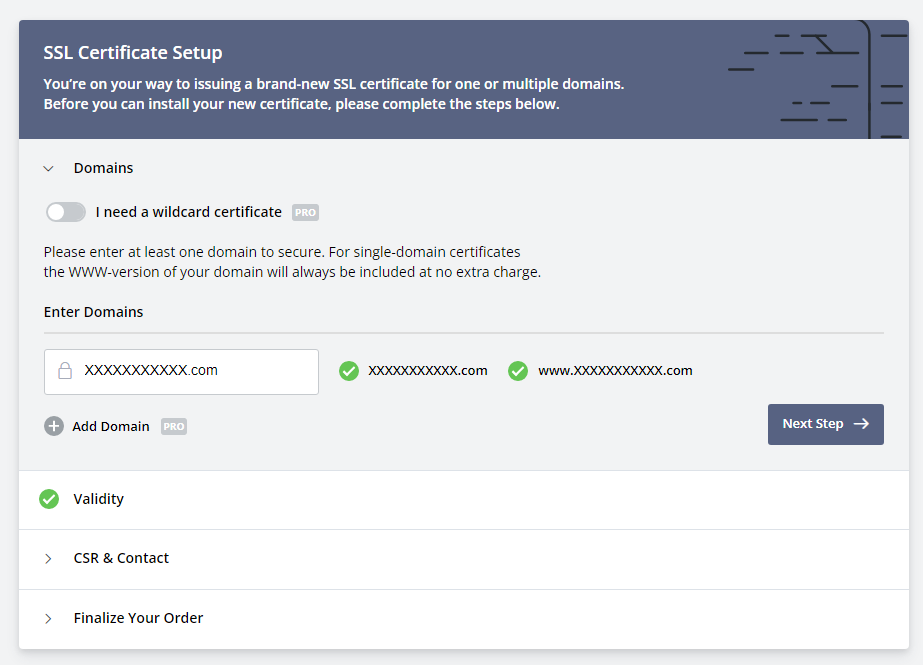
Start the process of generating an SSL by filling in the domain name:
![Generate and setup free hostname SSL on WHM with ZeroSSL chrome XcVu7ZYvrE - Generate and setup free hostname SSL on WHM with ZeroSSL](https://i0.wp.com/pcx3.com/wp-content/uploads/2021/12/chrome_XcVu7ZYvrE.png?resize=736%2C530&ssl=1)
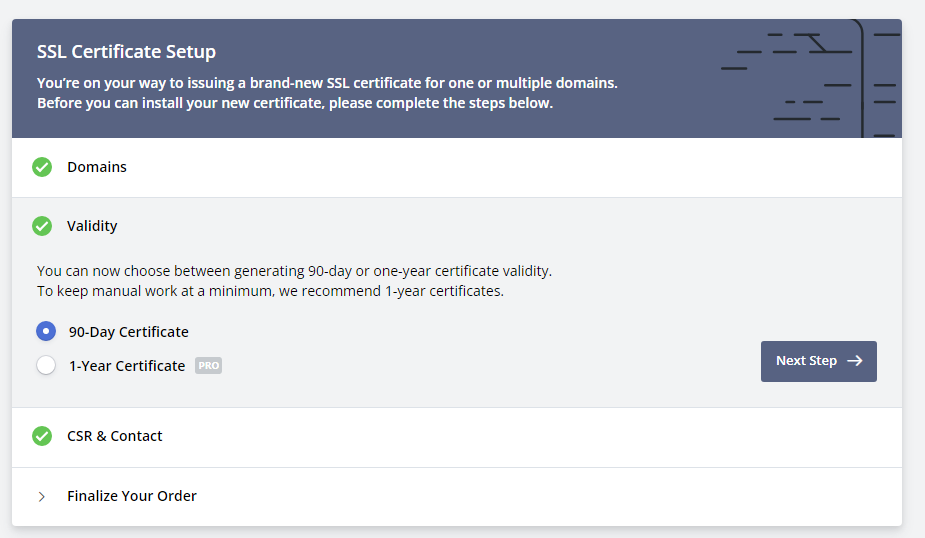
For Validity select 90 days
![Generate and setup free hostname SSL on WHM with ZeroSSL chrome x1S0doY6PE - Generate and setup free hostname SSL on WHM with ZeroSSL](https://i0.wp.com/pcx3.com/wp-content/uploads/2021/12/chrome_x1S0doY6PE.png?resize=736%2C428&ssl=1)
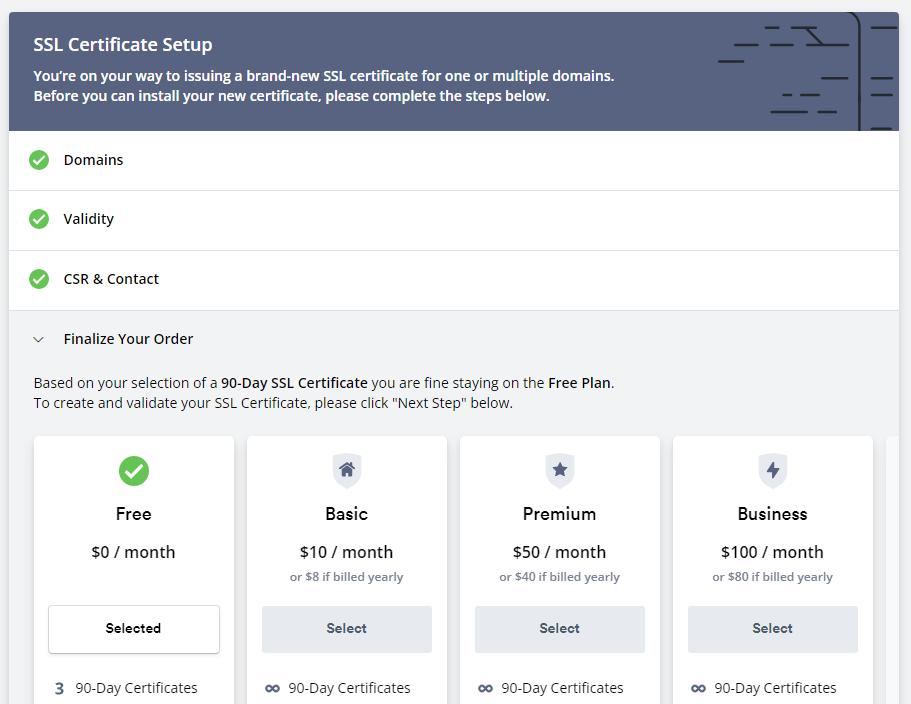
and for CSR & Contact select the Free option
![Generate and setup free hostname SSL on WHM with ZeroSSL chrome s2IcB1QwfS - Generate and setup free hostname SSL on WHM with ZeroSSL](https://i0.wp.com/pcx3.com/wp-content/uploads/2021/12/chrome_s2IcB1QwfS.png?resize=736%2C569&ssl=1)
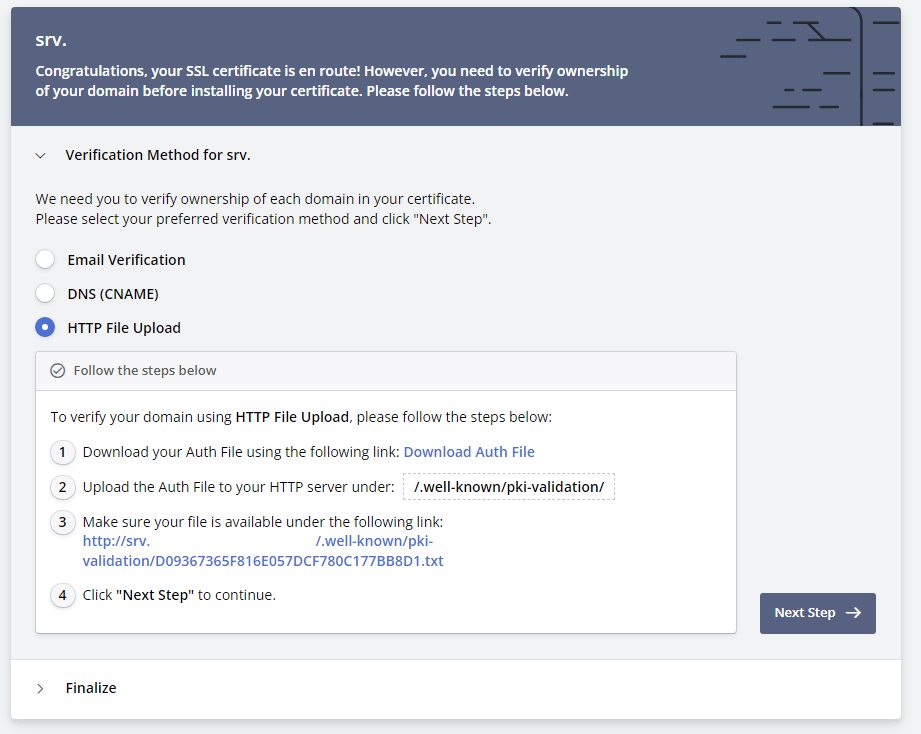
There are multiple verification methods available, for this example I will use the HTTP File Upload
![Generate and setup free hostname SSL on WHM with ZeroSSL chrome MzxMywAmNC - Generate and setup free hostname SSL on WHM with ZeroSSL](https://i0.wp.com/pcx3.com/wp-content/uploads/2021/12/chrome_MzxMywAmNC.png?resize=736%2C587&ssl=1)
Download the file and save it on your device.
Step 2. Upload the verification file to the server.
cd /usr/local/apache/htdocs/.well-known/pki-validation/
make sure the name is the same as the original and test if you can call it by URL: https://yourserver-com/ /.well-known/pki-validation/FILENAMEHERE.txt
If you can open it by URL, go back to zerossl website and finish the verification process to get your new ssl.
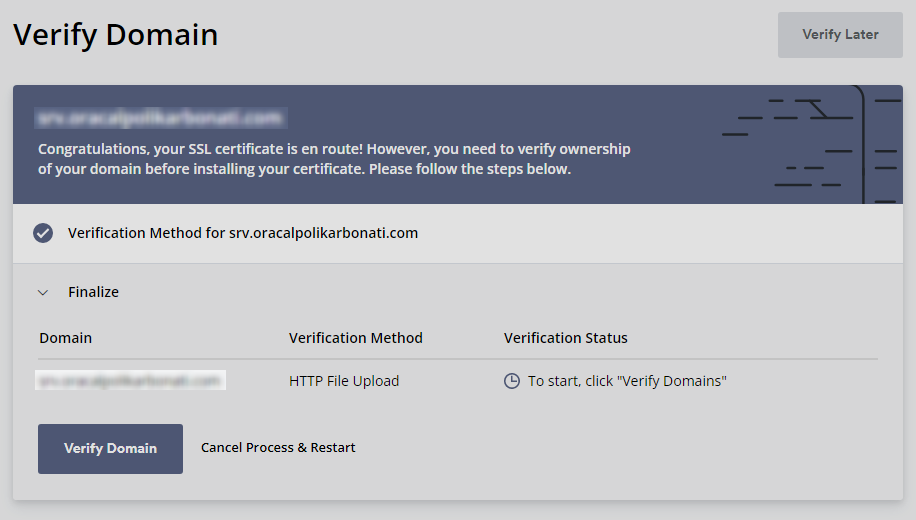
![Generate and setup free hostname SSL on WHM with ZeroSSL ShareX 0LbbBXRMz3 - Generate and setup free hostname SSL on WHM with ZeroSSL](https://i0.wp.com/pcx3.com/wp-content/uploads/2021/12/ShareX_0LbbBXRMz3.png?resize=736%2C418&ssl=1)
You should see your newly generated SSL and download the files.
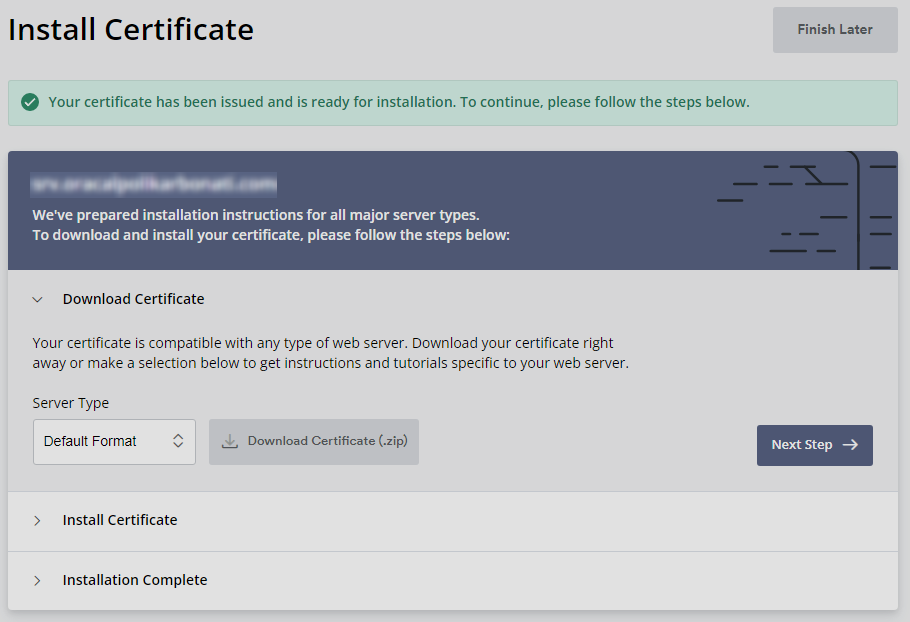
![Generate and setup free hostname SSL on WHM with ZeroSSL ShareX HNKQqlpv9n - Generate and setup free hostname SSL on WHM with ZeroSSL](https://i0.wp.com/pcx3.com/wp-content/uploads/2021/12/ShareX_HNKQqlpv9n.png?resize=736%2C503&ssl=1)
Step 3. Login to your WHM and navigate to Install an SSL Certificate on a Domain
Under Domain set the IP of the server and fill in the certificate along with the private key.
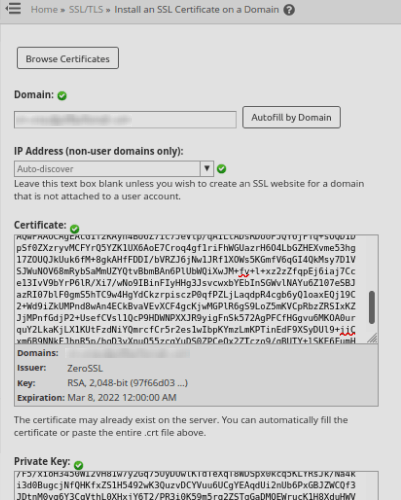
![Generate and setup free hostname SSL on WHM with ZeroSSL ShareX LNz8pNyG7l - Generate and setup free hostname SSL on WHM with ZeroSSL](https://i0.wp.com/pcx3.com/wp-content/uploads/2021/12/ShareX_LNz8pNyG7l.png?resize=401%2C500&ssl=1)
Step 4. From WHM navigate to Manage Service SSL Certificates
From the list of services select them all:
![Generate and setup free hostname SSL on WHM with ZeroSSL image 2 - Generate and setup free hostname SSL on WHM with ZeroSSL](https://i0.wp.com/pcx3.com/wp-content/uploads/2021/12/image-2.png?resize=453%2C128&ssl=1)
Then click on Browse Certificates and under Apache select your SSL
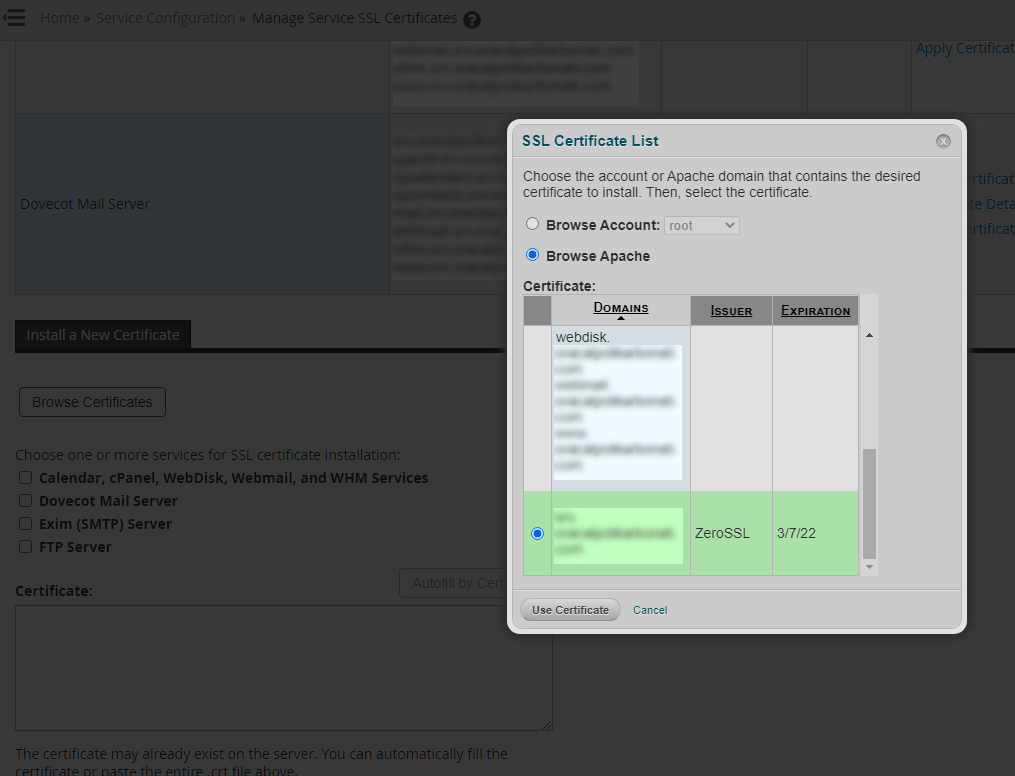
![Generate and setup free hostname SSL on WHM with ZeroSSL ShareX WfughJ2JNw - Generate and setup free hostname SSL on WHM with ZeroSSL](https://i0.wp.com/pcx3.com/wp-content/uploads/2021/12/ShareX_WfughJ2JNw.png?resize=736%2C563&ssl=1)
Click on the “Use Certificate” button, then on “Install” button confirm the cpsrvd service restart.
that’s it.