Step 1. Add the dedicated IP address to the user’s subdomain file.
cd /var/cpanel/userdata/username
Note: username represents the user who requires that each subdomain use a dedicated IP address.
nano subdomain.example.comThe file’s contents will resemble the following example:
Change the IP line to reflect the dedicated IP address to assign to the subdomain, for example:
ip: 192.168.0.20

Step 2. Rebuild and restart Apache
After you modify the appropriate files, rebuild and restart Apache. To do this, run the following commands:
/usr/local/cpanel/scripts/rebuildhttpdconf
/usr/local/cpanel/scripts/restartsrv_apache
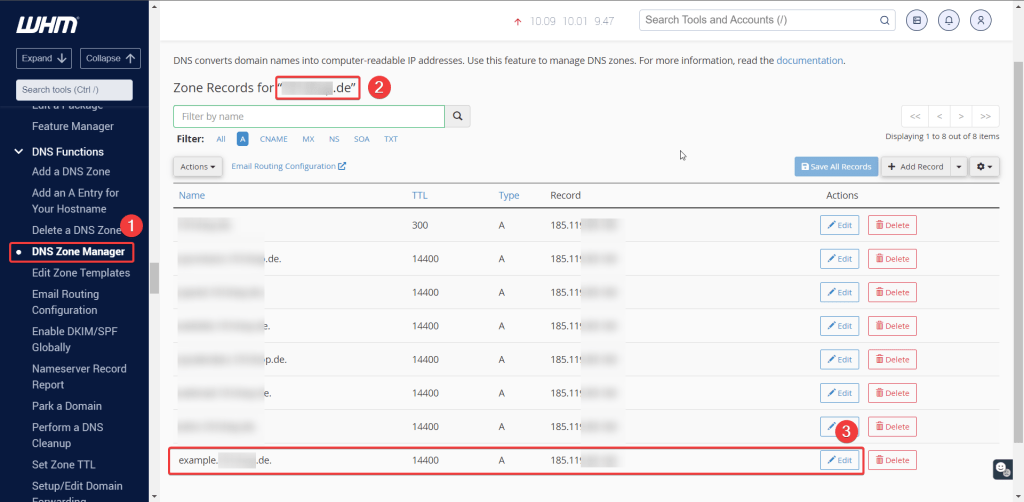
Step 3. Add the subdomain’s dedicated IP address to the server’s nameserver records. To do this edit the subdomain’s IP address in WHM’s Edit DNS Zone interface (WHM > DNS Functions > DNS Zone Manager).

Step 4. Reserve the dedicated IP address
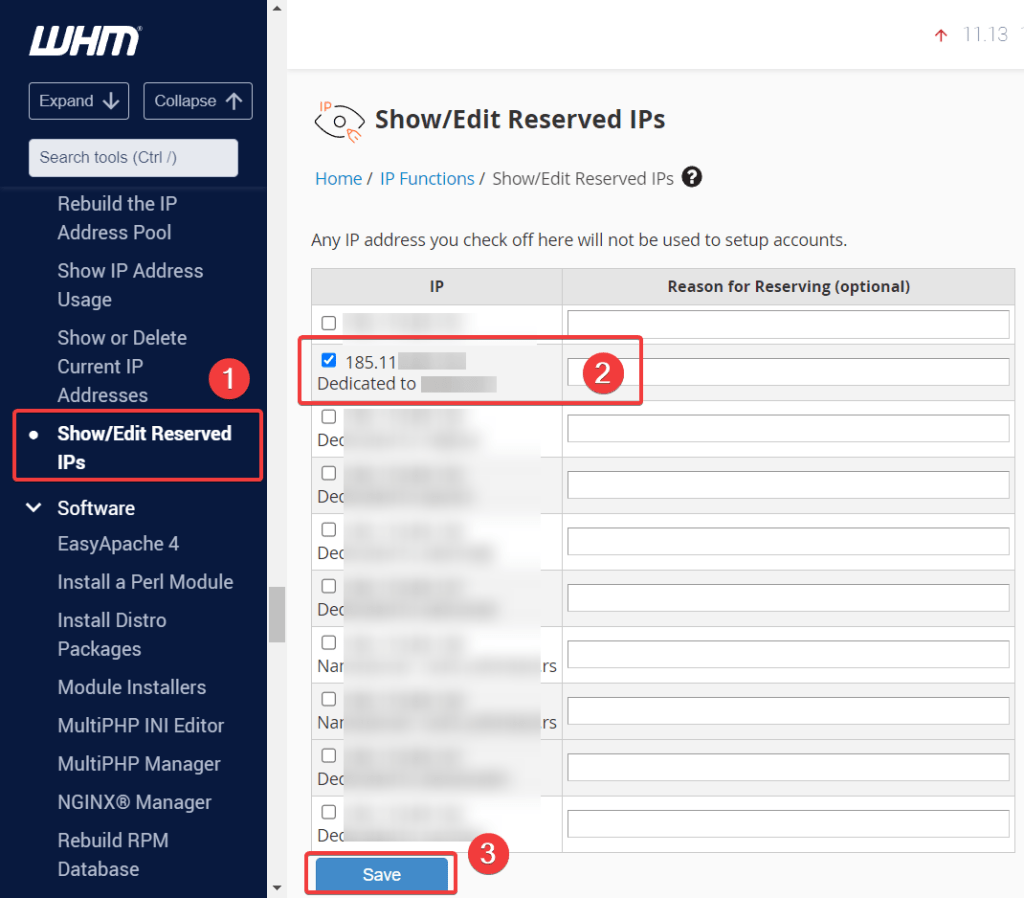
To reserve the subdomain’s dedicated IP address, Add the subdomains’ dedicated IP address to the reserved IP list so that the system does not assign it to other accounts or sites.
WHM > IP Functions > Show/Edit Reserved IPs


![node[175421]: pthread_create: Resource temporarily unavailable 2023 08 28 12 15 344x194 - node[175421]: pthread_create: Resource temporarily unavailable](https://pcx3.com/wp-content/uploads/2023/08/2023-08-28_12-15-344x194.png)