- Installing an SSL via Vesta Control Panel
- Installing a free Let’s Encrypt SSL via terminal
Installing SSL via Vesta Control Panel
To add a SSL to a website in Vesta, you must first complete the following:
- Add the domain name
- Change DNS to the server
- Generate/Purchase SSL
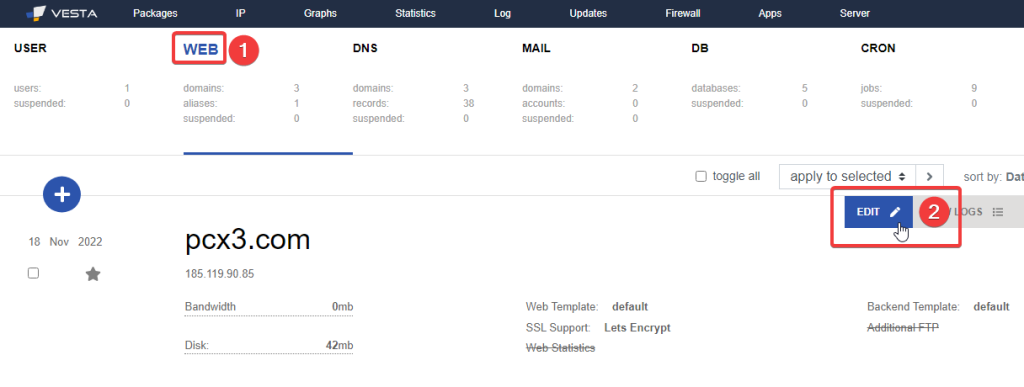
When done, navigate to WEB > EDIT

Select SSL Support and add the SSL:

then scroll to the bottom and click save.
Installing a free Let’s Encrypt SSL via terminal
This step will install LetsEncrypt the same way you can install it via Vesta web panel.
Run the script after adding the domain to VestaCP and confirming that it is pointing to the server:
v-add-letsencrypt-domain admin domain.com💡 Replace admin with the username and domain.com with the actual domain name.
/usr/local/vesta/bin/v-add-letsencrypt-domain is a built-in tool that checks and validates domains via Let’s Encrypt.


